|
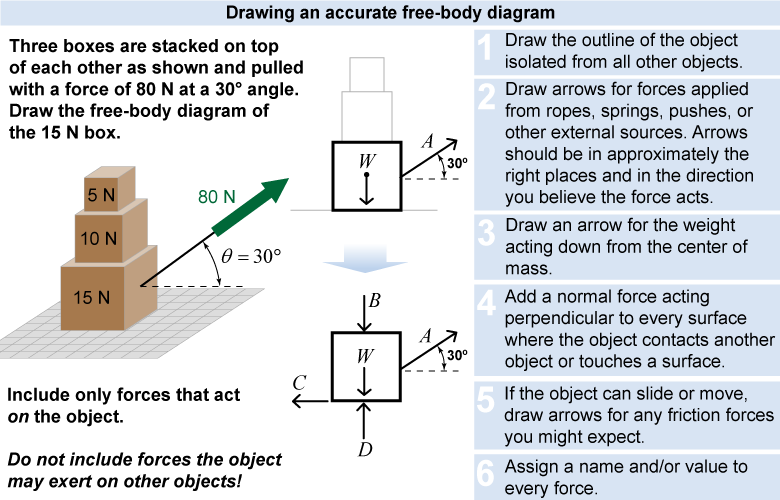
An accurate free-body diagram is essential to solving all but the simplest force problems. Keep in mind that free-body diagrams are not supposed to be art! Draw simple outlines of objects—adding too many details does not help you solve the problem and may even make a diagram hard to interpret. The important thing is to get the general shape of the object, identify and sketch all the forces in the right places, and assign variable names so you don’t confuse yourself. 
|

|
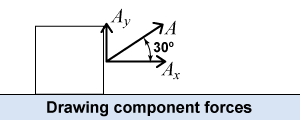
 One of the main reasons for drawing a free-body diagram is to uniquely assign names and directions to each force, especially unknown forces. You may wish to draw the component forces when a problem includes forces at angles other than 90°. This will help you keep track of the subscripts when there are several forces.
|
In free-body diagrams you assign positive and negative directions to forces. When you draw an arrow for an unknown force on a free-body diagram you are explicitly choosing the direction of the force. Don’t worry if you don’t choose correctly! After you solve the problem, if the force has the opposite sign from what you chose, it means the force is in the opposite direction from the one in your diagram. 
|
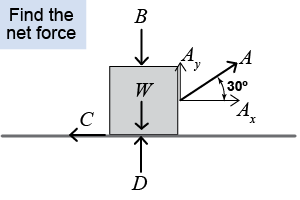
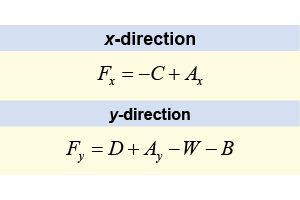
In almost all force problems the next step after drawing the force diagram is to find the net force in each component direction. A good way to accomplish this is to make a table that lists the equation for the forces in x and y separately. Put the table right next to the free-body diagram so you have a ready reference for identifying each force with the name and direction you assigned. Forces that point in a negative direction on the diagram should have negative signs in the equation! 
|

 |


|

